How to install eSIM on iPhone?
Setting up your eSIM on an iPhone with TravelData is fast and straightforward. Keep in mind that TravelData eSIMs are designed for data-only use — they give you internet access but don’t support voice calls or SMS. Follow the steps below to activate your eSIM and enjoy smooth, reliable data roaming wherever you travel.
Step 1: Ensure Your iPhone is eSIM-Compatible
First, verify that your iPhone supports eSIM technology. Most modern models — starting from the iPhone XS and XR onward — are fully eSIM-compatible. Also, make sure your device is updated to the latest iOS version to avoid any installation or compatibility issues.
Step 2: Get Your eSIM Activation Information
After purchasing your eSIM from TravelData, you’ll receive an email containing your activation details, including a QR code and simple, step-by-step instructions. Keep this email nearby during setup to make the installation quick and effortless.
Step 3: Connect to Wi-Fi
Before beginning the installation, make sure your iPhone is connected to a stable Wi-Fi network. A reliable connection ensures the eSIM downloads and activates smoothly without interruptions.
Step 4: Add Your eSIM to Your iPhone
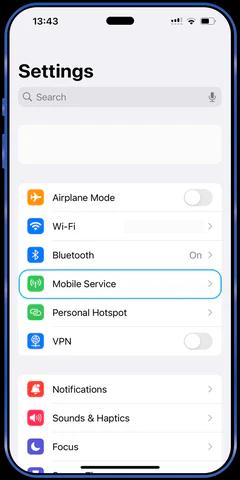
- 1Open Settings on your iPhone.
- 2Tap Cellular or Mobile Data.
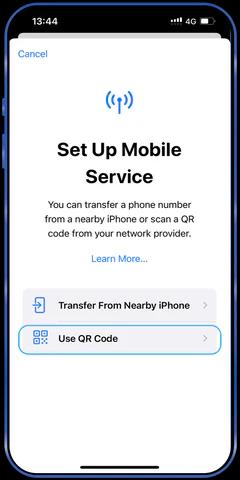
- 3Select Add Cellular Plan.
- 4Your iPhone will prompt you to scan the QR code you received from TravelData.

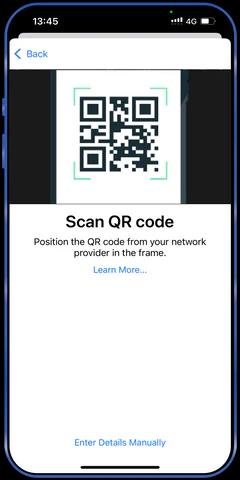
Step 5: Scan the eSIM QR Code
- 1Use your iPhone's camera to scan the QR code from the email.
- 2After scanning, confirm the details and tap Add Cellular Plan to complete the installation.
Step 6: Set Your eSIM for Data Usage
Since TravelData eSIMs are data-only, you’ll want to set it up as your primary option for mobile data during configuration.
Data-Only Usage: Set the eSIM as your preferred line for mobile data. Remember, our eSIM is designed exclusively for internet access and does not support voice calls or SMS.
Step 7: Activate Cellular Data
To enable data on your eSIM:
- 1Open Settings > Cellular.
- 2Select the newly installed eSIM.
- 3Turn on Cellular Data and choose it as the default for internet access if needed.
Step 8: Confirm the Activation
Check that your eSIM is correctly installed and active:
- 1Go to Settings > Cellular.
- 2Ensure that the eSIM is connected to a network and shows signal strength.
Step 9: Start Using Your eSIM for Data Roaming
Your TravelData eSIM is now active and ready to use. You can begin browsing, using apps, and enjoying seamless data roaming right away. Just keep in mind that this eSIM is for data-only services and does not support calls or SMS.
Troubleshooting Tips:
- If you run into any issues, make sure your iPhone is updated to the latest iOS version — this often resolves installation or compatibility problems.
- Make sure you’re connected to a stable Wi-Fi network throughout the setup process to avoid any interruptions.
- If the eSIM doesn’t install or the network doesn’t show up, restart your iPhone and try the setup again. This often resolves minor activation issues.
For additional help, feel free to reach out to us at help@traveldata.global. Our support team is here to ensure you stay connected smoothly throughout your travels.